>>
30-MINUTE MEALS! Get the email series now →


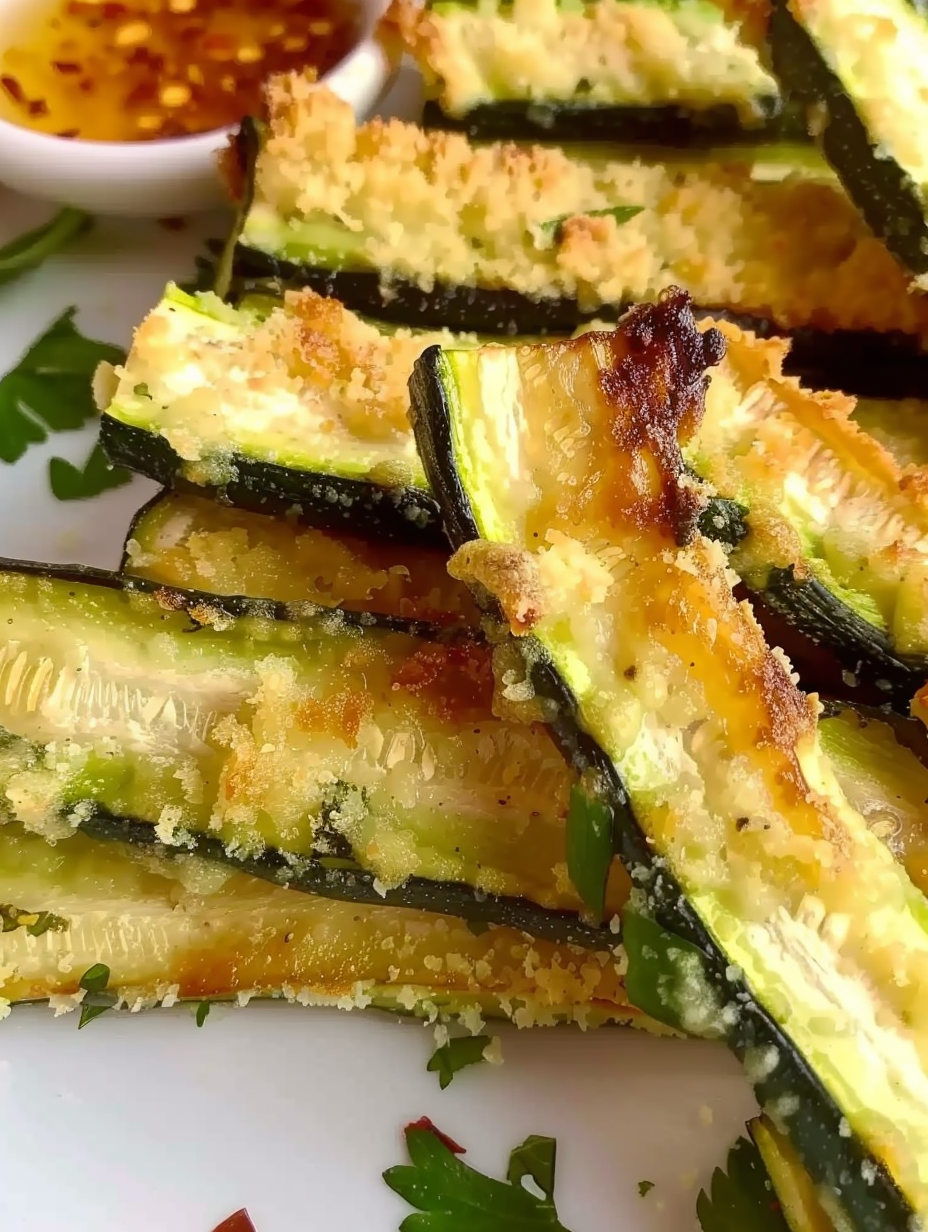
Crispy, golden zucchini fries made keto friendly and gluten free with a parmesan crust. A simple, garden fresh snack perfect for sharing.
This recipe for zucchini fries is rooted in summer afternoons spent in my mom's garden, where squash and zucchini grew so plentifully that we invented new ways to celebrate them. I first turned these slender green vegetables into a crispy snack on a hot August day when my children wanted something crunchy and salty without the heavy carbs of traditional fries. The result was so satisfying that it became our household favorite for kid friendly snacks and impromptu appetizers when friends pop by. The texture is light and crisp on the outside while the zucchini stays tender and moist within, and the fresh parmesan creates a sharp savory crust that sings with a squeeze of lemon or a little hot sauce.
What makes this version special is how simple it is to keep it keto friendly and gluten free without sacrificing crunch. Using freshly grated parmesan as the coating means little to no filler, and a single egg creates enough adhesion for the cheese to crisp up beautifully in a hot oven. I learned to trust the visual cues from that first batch, watching the edges turn golden and the cheese bubble along the spears. Serve these straight from the oven and you will see why warm, cheesy zucchini spears have become a ritual at our house during backyard dinners and movie nights.
Family reactions were immediate. My children clamored for seconds the first time I served them and my mom, who supplied the zucchini, insisted I write down the proportions so she could recreate the batch. Over time I adjusted the bake time and the cut size to hit the exact crispness we all prefer. It is now the dish I bring to backyard gatherings when someone asks for a snack that is both approachable and a little bit special.

My favorite part is watching guests reach for the first warm spear and comment on how the crust manages to be substantial without any breadcrumbs. Years of small tweaks taught me that drying the zucchini well and using freshly grated parmesan are the two most impactful steps for success. Those simple adjustments turned a good idea into a dish we now make repeatedly for small gatherings.

To keep quality, cool the fries completely before storing to prevent condensation. Place in a shallow airtight container layered with paper towels to absorb excess moisture and refrigerate for up to 3 days. To reheat and regain crunch, arrange on a baking sheet and bake at 375°F for 6 to 8 minutes, turning halfway. Avoid microwaving as it makes the coating soggy. If you plan to meal prep, hold off on breading until you are ready to bake. Pre cut zucchini will last 1 to 2 days refrigerated when wrapped tightly.
If you need a dairy free option, swap parmesan for a finely ground nut crust such as almond flour mixed with nutritional yeast though texture and flavor will be different. For an egg free binder, try a mixture of 1 tablespoon of ground flaxseed with 3 tablespoons warm water to form a gel, but note that adhesion will be less sturdy so press the coating firmly. If you want extra herbaceous notes, mix in 1 teaspoon dried oregano or 1 tablespoon finely chopped fresh basil into the parmesan for bright flavor.
Serve these spears as an appetizer with small bowls of dipping sauces. A lemon garlic aioli, a sugar free marinara, or a whipped herbed ricotta all pair beautifully. For a complete meal turn them into a plate by adding a simple green salad and a protein such as grilled chicken or seared salmon. Garnish with a sprinkling of extra parmesan and chopped parsley to brighten presentation.
Coating vegetables in cheese and baking until crisp draws on Mediterranean traditions of using local cheeses to add savory structure to simple produce. While classic fries are an Americanized comfort food, this version combines Italian flavors via parmesan with the American love of snack able finger food. Over time such adaptations have become common in home kitchens seeking lighter versions of familiar favorites.
In summer use the smallest, freshest zucchini from the garden for the sweetest interior and best texture. In cooler months you can swap summer squash varieties or increase heat with smoked paprika and cayenne. For holiday gatherings, add a pinch of finely grated nutmeg to the cheese for a warm, festive note that pairs well with roasted proteins.
For make ahead ease, cut and dry the zucchini and store the spears in a single layer wrapped in paper towels for up to 24 hours. Mix the parmesan coating ahead and keep it airtight at room temperature. When ready, bread and bake so the texture is optimal. If preparing for a party, bake in batches and keep warm in a 200°F oven on a wire rack to preserve crispness until serving.
These zucchini spears are a small celebration of fresh produce, simple technique, and shared meals. They reward attention to small details like drying and freshly grating cheese, and they make an everyday ingredient feel joyful and shareable. Try them once and you may find, as my family did, that they become a go to for relaxed entertaining and quick, satisfying snacks.
Dry zucchini thoroughly with paper towels before breading to help the cheese adhere and crisp.
Use freshly grated parmesan for the best melt and browning; avoid pre grated varieties that contain anti clumping agents.
Check the oven at 15 minutes because ovens vary; remove as soon as edges turn golden to avoid bitterness.
This nourishing keto gluten free zucchini fries recipe is sure to be a staple in your kitchen. Enjoy every moist, high protein slice — it is perfect for breakfast or as a wholesome snack any time.
This Keto Gluten Free Zucchini Fries recipe makes perfectly juicy, tender, and flavorful steak every time! Serve with potatoes and a side salad for an unforgettable dinner in under 30 minutes.
Preheat the oven to 400°F and line a rimmed baking sheet with parchment paper. Place the oven rack in the middle position to promote even browning.
Rinse zucchini and trim ends. Cut each zucchini in half lengthwise, then into quarters lengthwise and then crosswise so spears are a few inches long and uniform in thickness.
Lightly season the spears with a pinch of salt. Whisk 1 large egg in a shallow bowl. In another shallow bowl combine 3/4 cup freshly grated parmesan, 1/2 teaspoon garlic powder and the optional 1/2 teaspoon red pepper flakes.
Dip each dried spear into the beaten egg, let excess drip off, then roll in the parmesan mixture pressing lightly so the cheese adheres. Arrange on the lined baking sheet a few inches apart.
Bake for roughly 20 minutes or until the parmesan edges are golden and crisp. Check at 15 minutes as oven performance varies. Remove when golden to avoid burning.
Serve immediately for best texture with your favorite dipping sauce. Leftovers can be reheated in a 375°F oven for 6 to 8 minutes to restore some crispness.
Last Step: Please leave a rating and comment letting us know how you liked this recipe! This helps our business to thrive and continue providing free, high-quality recipes for you.
Leave a comment & rating below or tag
@royalrecipe on social media!

Easy homemade thin-crust three-cheese spicy chicken and jalapeño pie — a flavor-packed pizza with a satisfying kick, perfect for pizza night or game day.

A bright, creamy BLT pasta salad tossed with basil pesto, fresh greens, cherry tomatoes, and crisp bacon—perfect for warm-weather gatherings and meal prep.

Tender sautéed shrimp tossed with spaghetti and a creamy sweet-spicy bang bang sauce—ready in under 30 minutes for a weeknight favorite.
Leave a comment & rating below or tag @royalrecipe on social media!
Enjoyed this recipe? Share it with friends and family, and don't forget to leave a review!
This recipe looks amazing! Can't wait to try it.
Comments are stored locally in your browser. Server comments are displayed alongside your local comments.
Join to receive our email series which contains a round-up of some of our quick and easy family favorite recipes.
