>>
30-MINUTE MEALS! Get the email series now →


Learn how to make creamy homemade white chocolate using just three pantry-friendly ingredients and simple equipment. Perfect for gifts, baking, or a sweet treat.
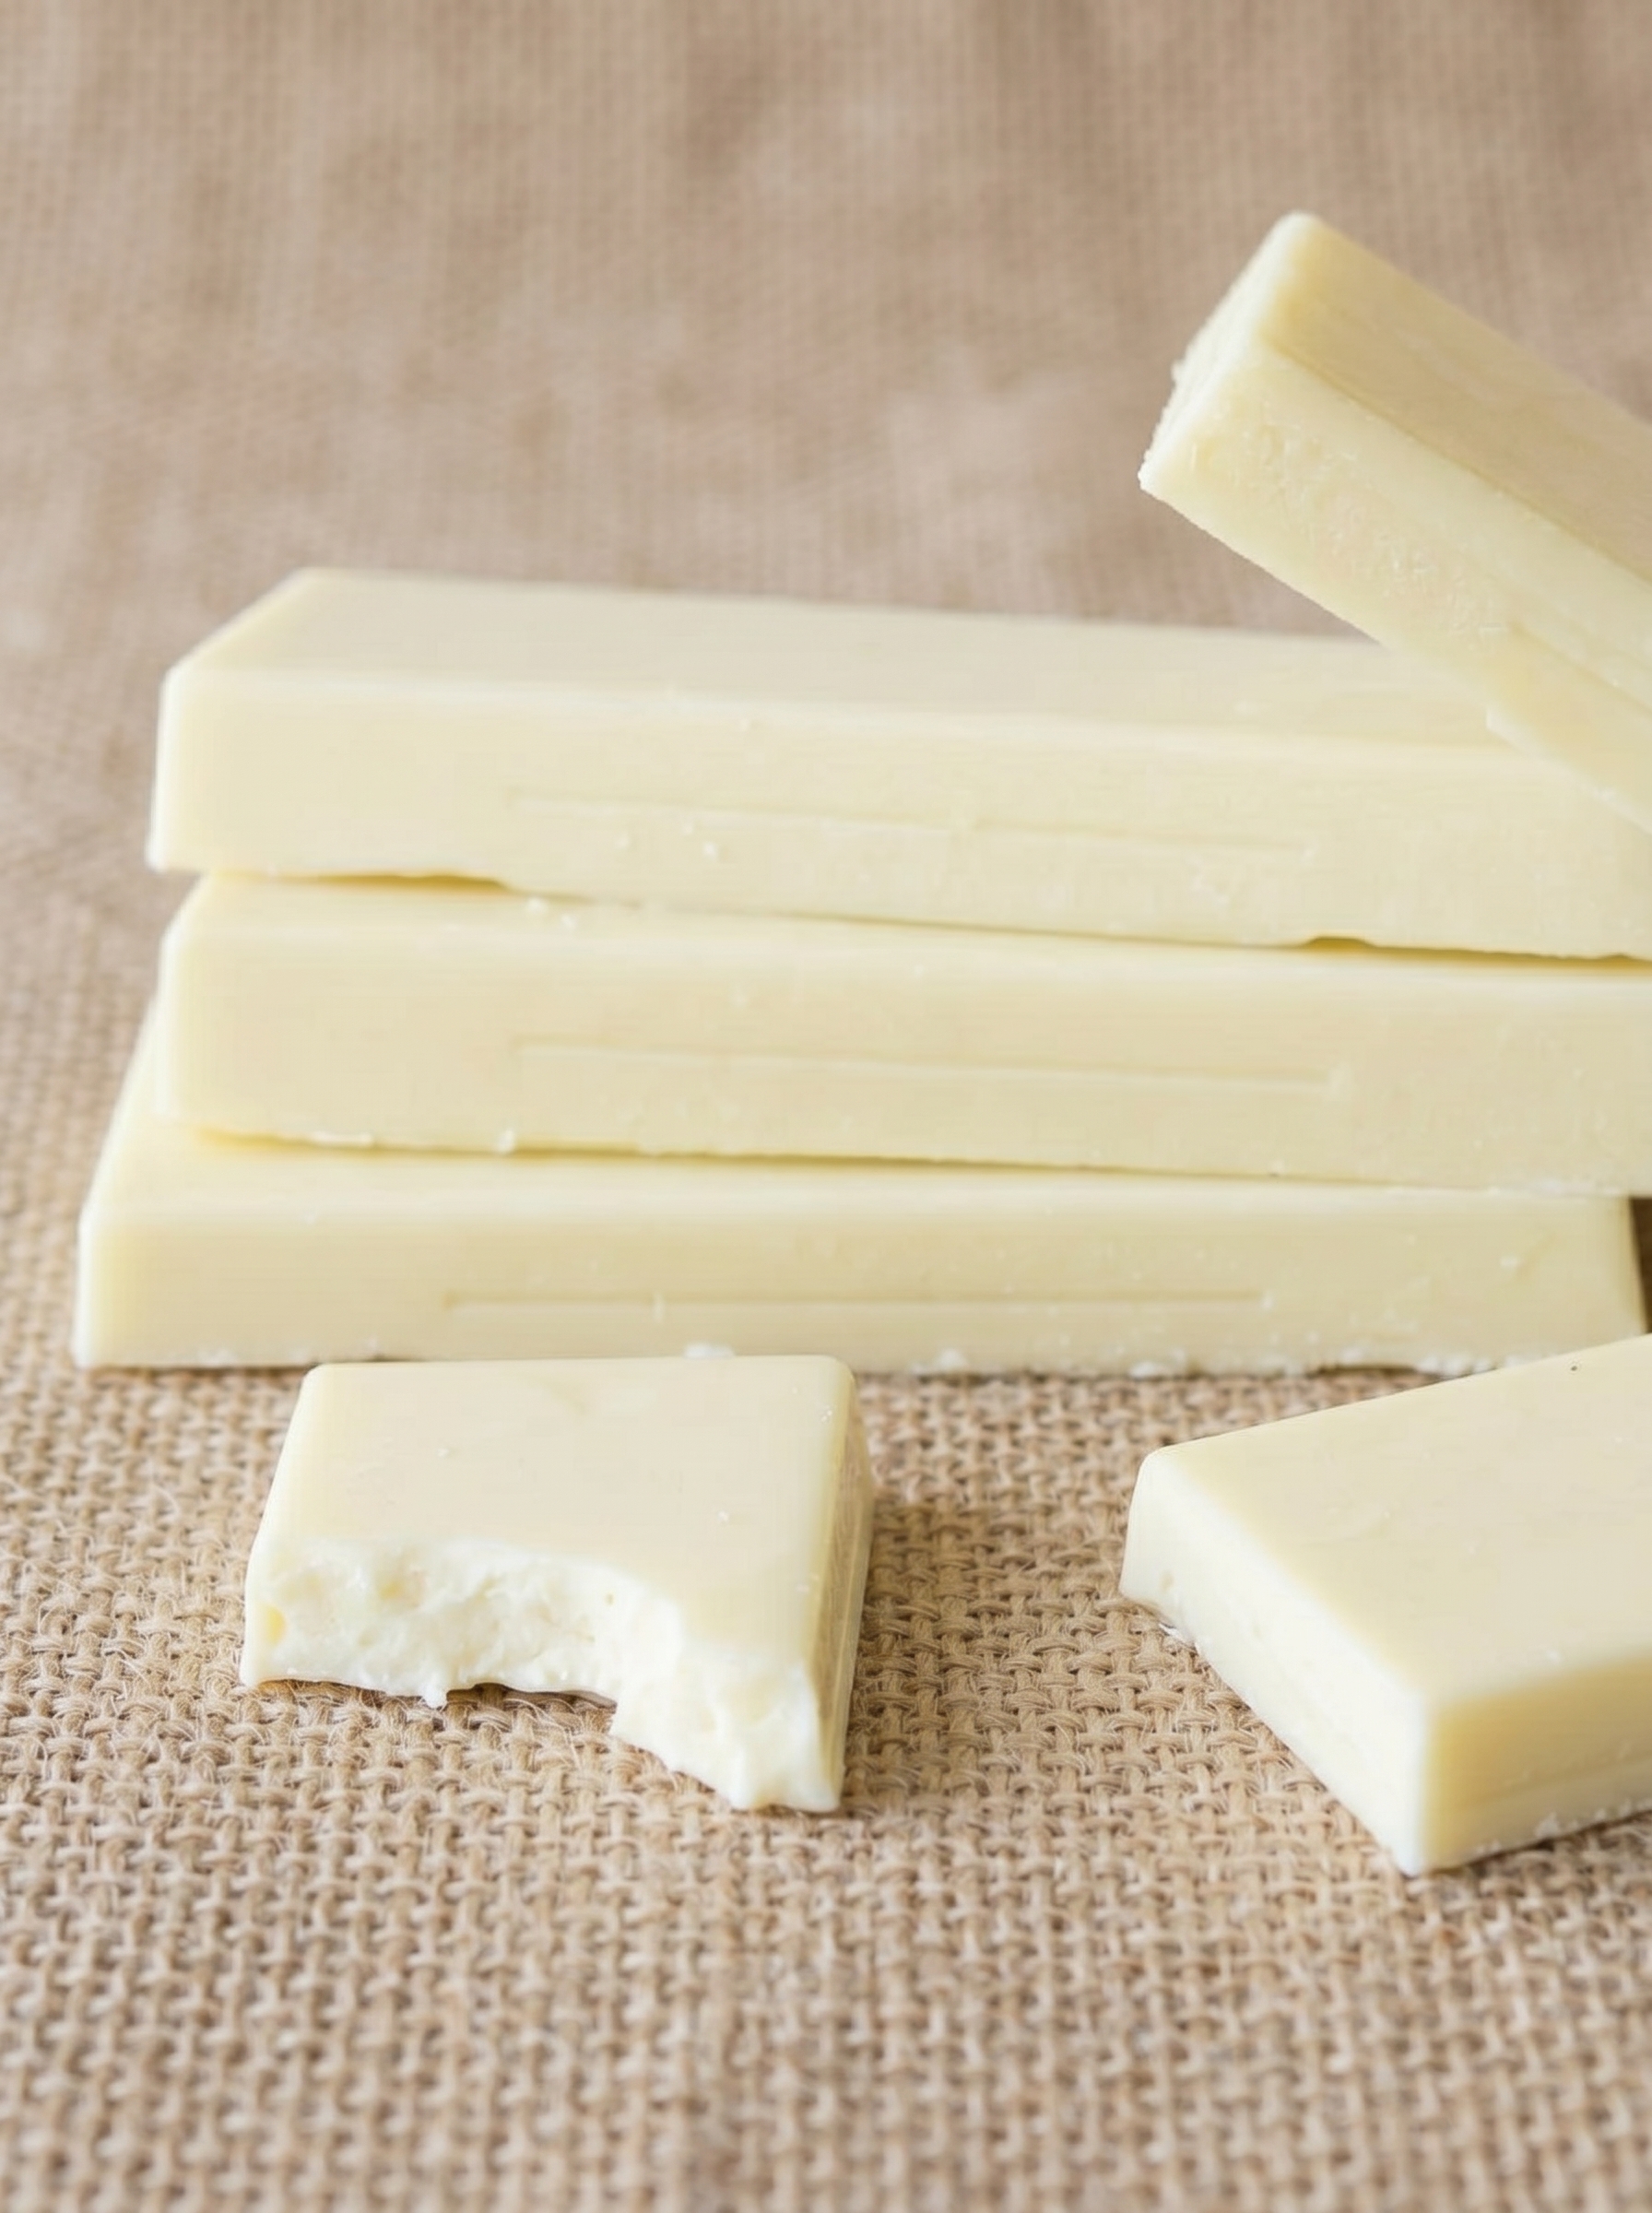
This simple, three-ingredient white chocolate is one of those discoveries that changed the way I think about homemade confections. I first tried this method on a quiet weekend when I had cocoa butter and milk powder on hand and wanted a quick project that didn’t demand tempering or complicated equipment. The result was a sweet, creamy slab of white chocolate with a satisfying snap and a velvety mouthfeel that made everyone at the table smile. It’s not as ultra-silky as mass-produced chocolate unless you use a melanger, but the flavor is clean, buttery, and nostalgic—exactly what you'd expect from classic white chocolate.
What I love about this version is how forgiving it is: three straightforward ingredients, just a little melting and blending, and you have a bar ready to set in under an hour. Over the years I’ve tweaked the grind of the sugar and milk powder and experimented with molds and flavor additions, and each time the base process has held up beautifully. Whether you want to make small gifts, experiment with inclusions like citrus zest or toasted nuts, or simply learn the fundamentals of making chocolate from cocoa butter, this method is a wonderful place to start.
Personally, I remember the first time I un-molded a bar: the little imperfections and the slightly grainy texture from my home grinder felt incredibly charming. Friends preferred the rustic homemade character, and my kids loved the sweet richness. Over time I learned to grind the sugar and milk powder finer and to use a melanger for a truly polished finish; but for everyday treats, this three-ingredient approach delivers comfort and flavor every time.
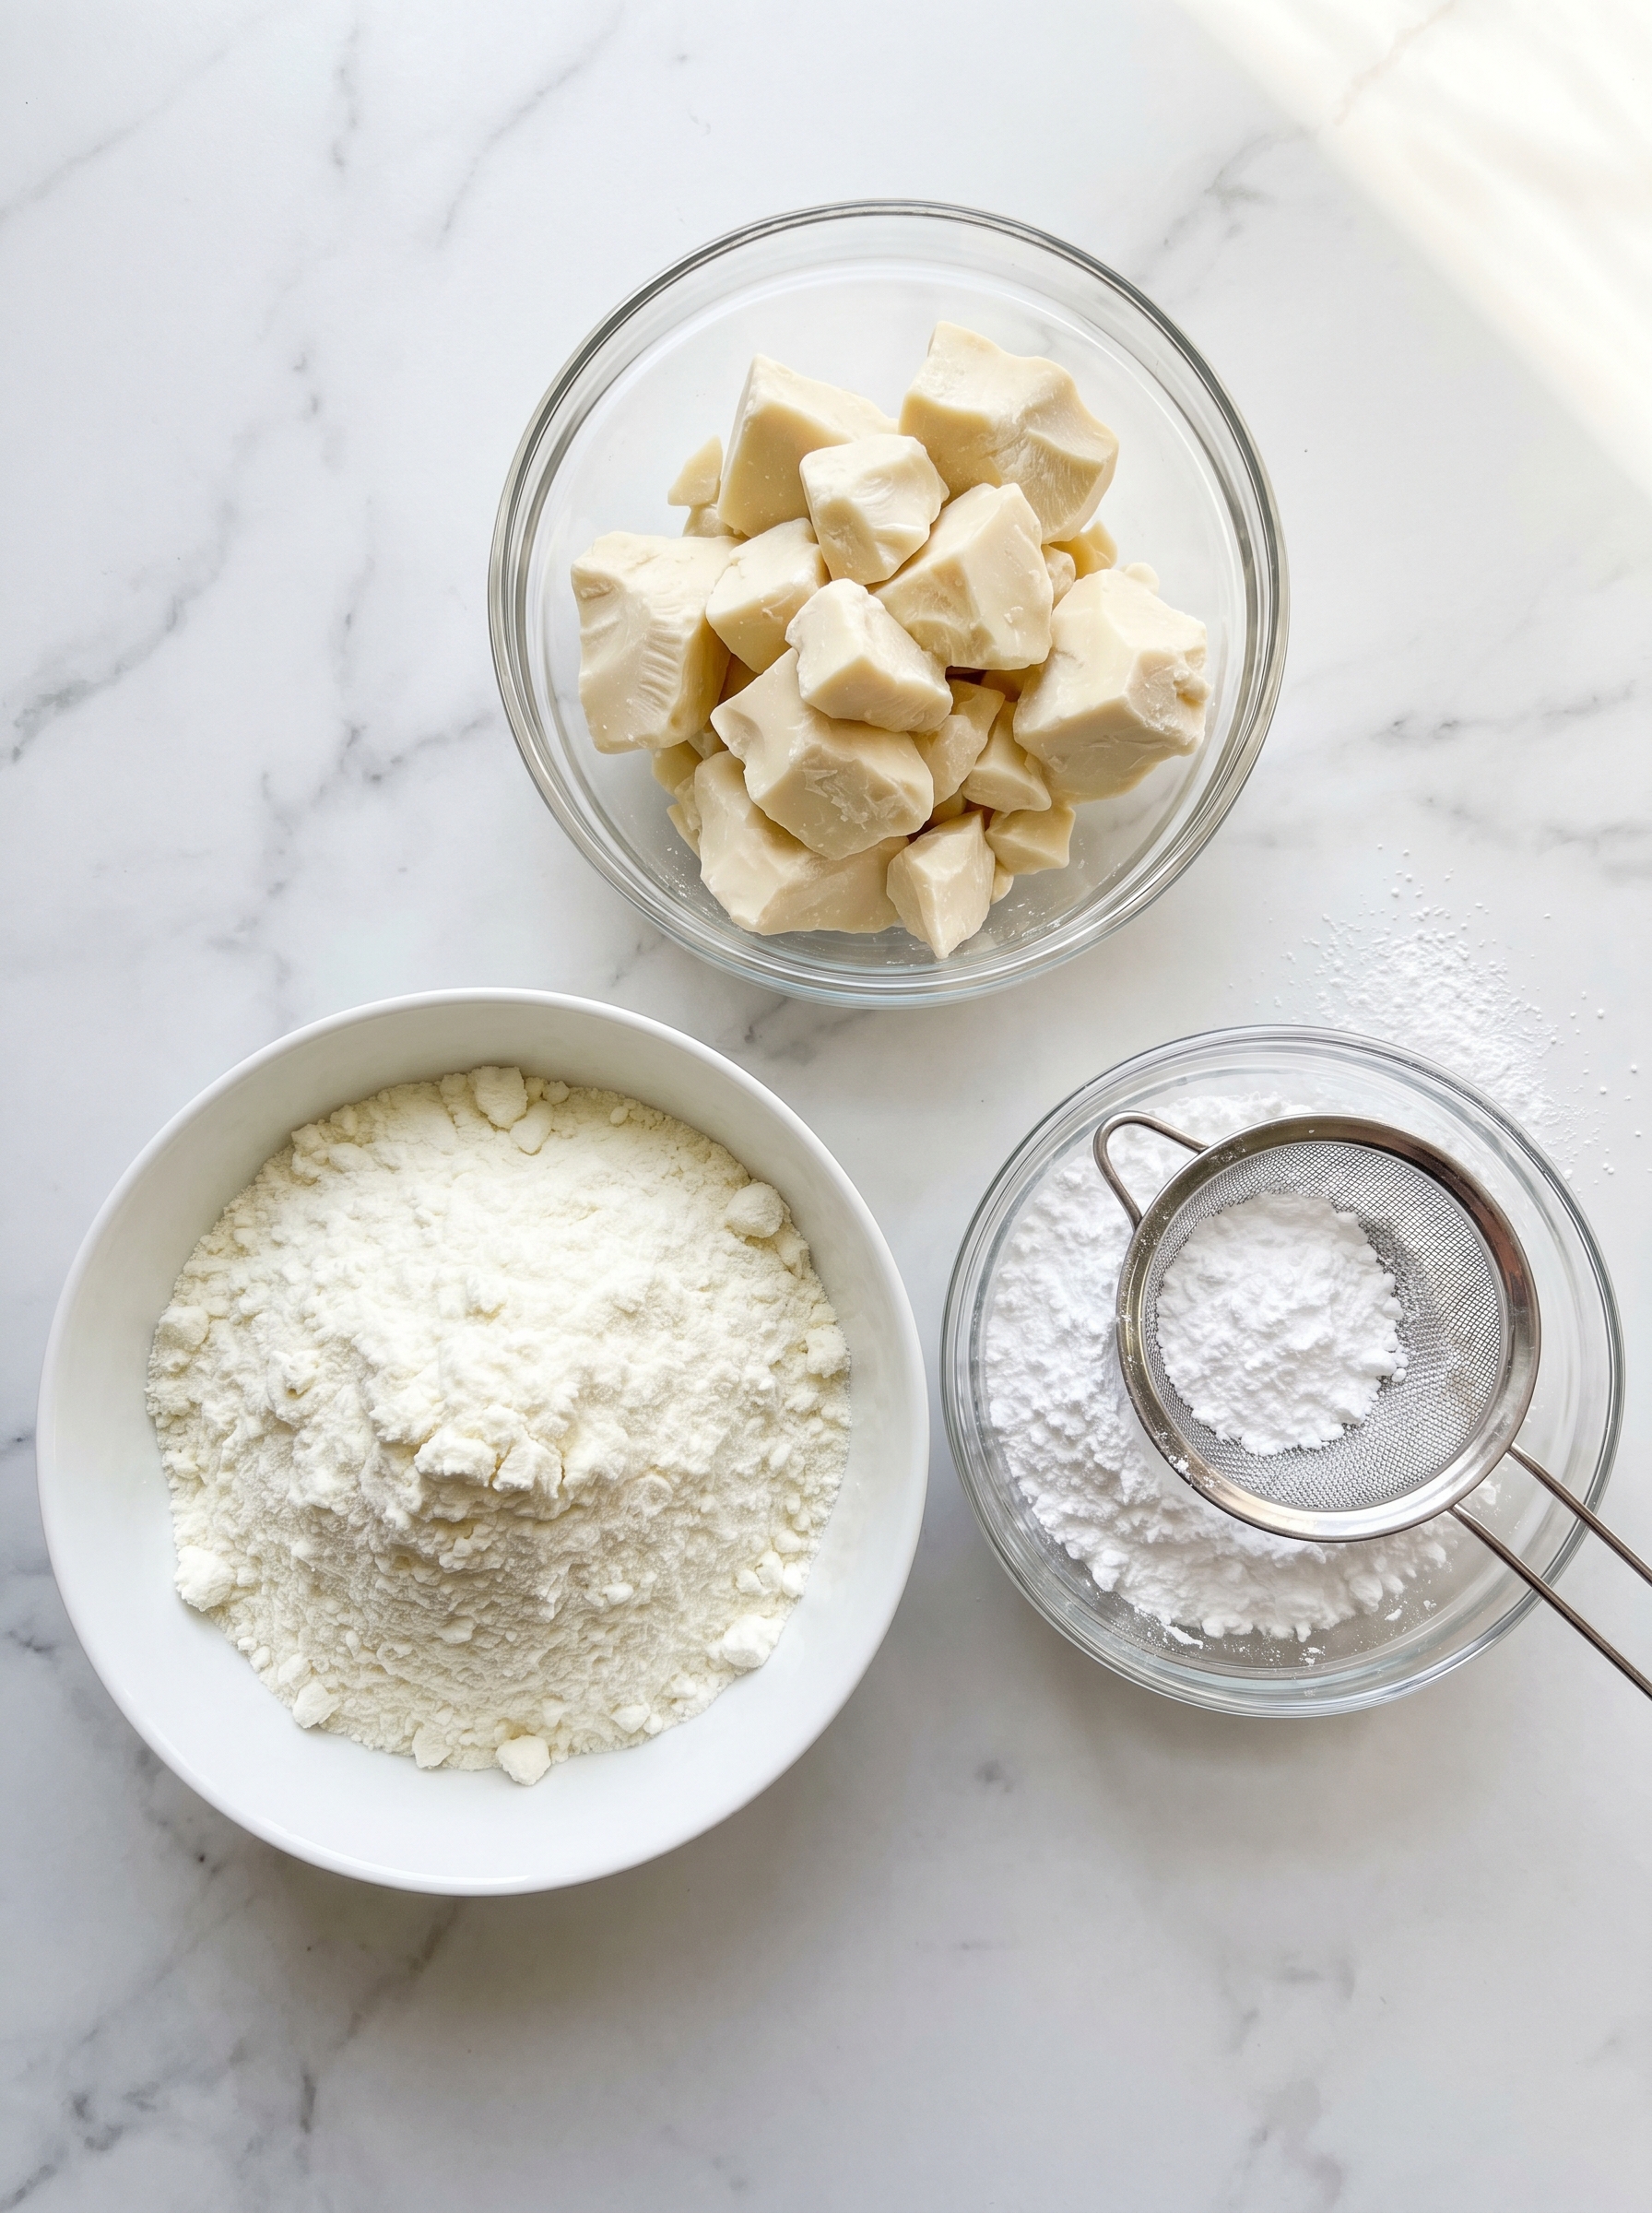
Note on measurements: this recipe uses simple U.S. cup measures so it’s easy to scale. The proportions are equal by volume: 1/2 cup cocoa butter, 1/2 cup milk powder, 1/2 cup sugar. If you want a richer mouthfeel, reduce the sugar by a tablespoon or two.
What I love most is the adaptability: swap in citrus oil for bright notes, add toasted pistachios for color and crunch, or shave into sauces for a quick white chocolate drizzle. Family members always ask for variations, and the process has become my go-to for customized chocolates at holidays and parties. The ritual of melting, blending, and watching the pale chocolate set is oddly calming and endlessly rewarding.
Store finished pieces in an airtight container at cool room temperature (60–68°F) away from direct sunlight. For longer storage, freeze in a ziploc or vacuum-sealed bag; separate layers with parchment to prevent sticking. When moving from freezer to room temperature, allow bars to come up to temperature inside their closed container to avoid condensation forming on the surface, which can dull the sheen. Refrigeration is acceptable in hot climates but may cause slight bloom, so bring chilled bars to room temperature before serving for the best flavor and texture.
If you can’t find cocoa butter, do not substitute vegetable shortening or butter—those change the flavor and melting properties. For a dairy-free version, swap whole milk powder for a non-dairy alternative like full-fat coconut milk powder, keeping in mind the flavor will shift. Use powdered sugar or finely ground granulated sugar; if your powdered sugar has cornstarch, the texture will still work but won’t be as authentic. For sweetness adjustments, reduce sugar by up to 5% and test the balance before setting.
Serve plain bars with tea or coffee, or chop and use as a topping for cakes, muffins, or ice cream. For gift-giving, wrap individual bars in parchment and tie with baker’s twine. Pair white chocolate with tart flavors like raspberry or passion fruit to cut richness, or match with toasted nuts and flaky sea salt for a sophisticated bar. Melt a portion for drizzling over fruit or to create a white chocolate ganache for cupcakes and tarts.
White chocolate is a modern invention compared to dark and milk chocolate; it uses cocoa butter without cocoa solids, giving it a pale ivory hue and a sweet, milky profile. While it’s not "chocolate" in the strictest sense by some standards because it lacks cocoa solids, it has become a beloved confection in European and American baking traditions, often used for confections, paired with fruit, and incorporated into luxury sweets in French pastry kitchens. Making it at home highlights the role of cocoa butter as the primary flavor and fat carrier.
In winter, fold in crushed peppermint and dip edges in dark chocolate for a festive contrast; in spring, add citrus zest or lavender for floral brightness. For fall, stir in a pinch of cinnamon and nutmeg or fold in candied ginger. The base emulsion takes flavor additions well—add oils or extracts sparingly, as they are highly concentrated. For holiday gifting, press toasted seeds or edible flowers onto the surface before chilling for a decorative finish.
Make larger batches and portion into small molds to create individual servings you can grab for baking or snacking. Freeze extras flat in parchment-lined trays, then transfer to a sealed bag once solid. If you plan to use the chocolate for baking, break into small disks and keep at room temperature to melt easily when added to batters or sauces. Label containers with the date; frozen bars are best used within three months for optimal flavor.
Homemade white chocolate is an approachable project that rewards curiosity. Its simplicity makes it a great stepping stone into more involved chocolate-making techniques, and I hope you enjoy customizing and sharing your bars as much as I do.
Grind the milk powder and sugar as finely as possible to reduce graininess in the finished product.
Use a double boiler or low-power microwave bursts to gently melt cocoa butter without overheating.
If you have a chocolate melanger, use it for several hours for a truly silky texture; otherwise blend thoroughly and accept a slightly rustic mouthfeel.
When unmolding, let bars sit at room temperature a few minutes to avoid bloom from temperature shock.
This nourishing how to make white chocolate with 3 ingredients recipe is sure to be a staple in your kitchen. Enjoy every moist, high protein slice — it is perfect for breakfast or as a wholesome snack any time.
Recipe data validation failed
Please check the recipe data format. See console for details.

Easy homemade thin-crust three-cheese spicy chicken and jalapeño pie — a flavor-packed pizza with a satisfying kick, perfect for pizza night or game day.

A bright, creamy BLT pasta salad tossed with basil pesto, fresh greens, cherry tomatoes, and crisp bacon—perfect for warm-weather gatherings and meal prep.

Tender sautéed shrimp tossed with spaghetti and a creamy sweet-spicy bang bang sauce—ready in under 30 minutes for a weeknight favorite.
Leave a comment & rating below or tag @royalrecipe on social media!
Enjoyed this recipe? Share it with friends and family, and don't forget to leave a review!
This recipe looks amazing! Can't wait to try it.
Comments are stored locally in your browser. Server comments are displayed alongside your local comments.
Join to receive our email series which contains a round-up of some of our quick and easy family favorite recipes.
