>>
30-MINUTE MEALS! Get the email series now →


Soft, chewy chocolate cookies with a glossy cherry center and a shiny chocolate glaze—perfect for holidays, bake sales, or an everyday sweet craving.
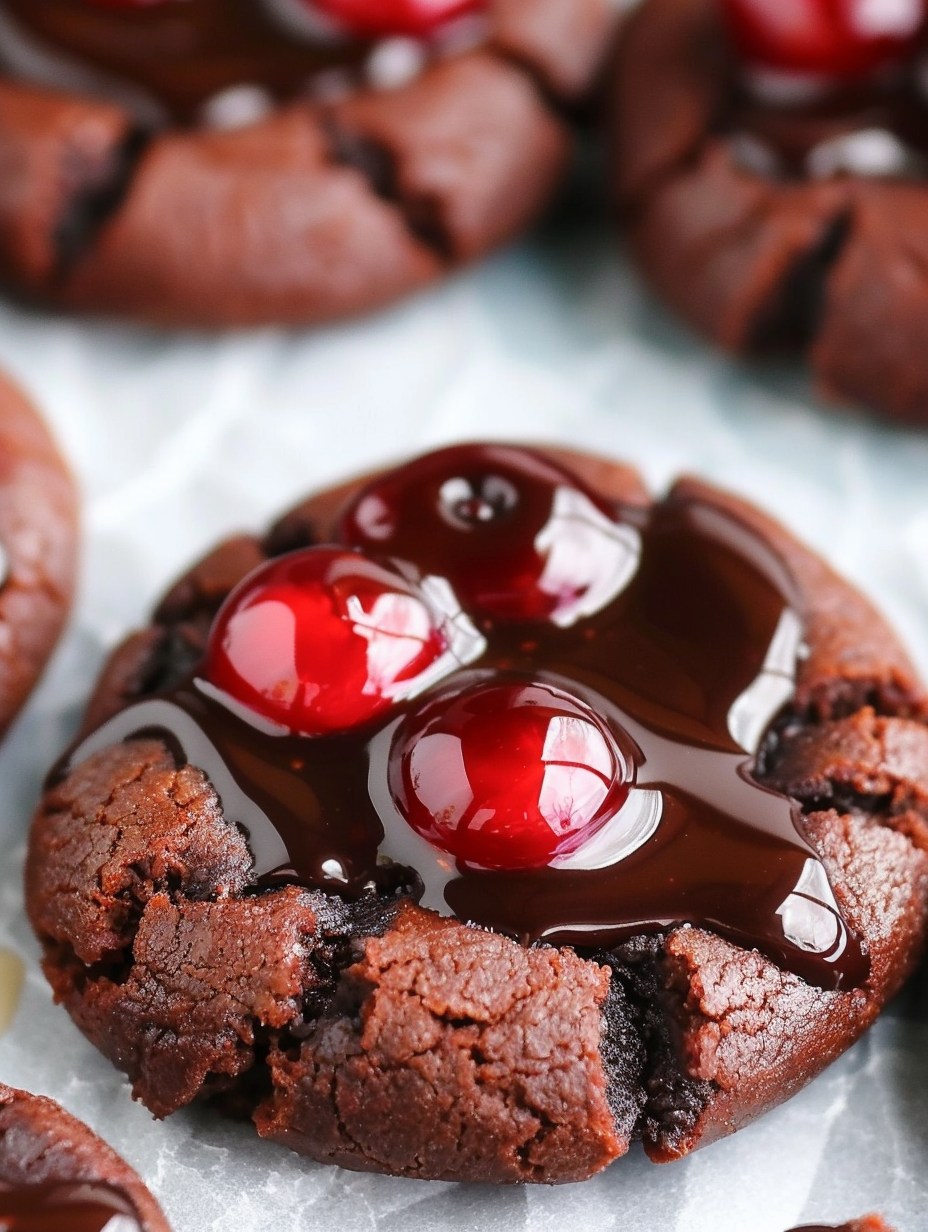
This batch of Chocolate Cherry Thumbprint Cookies has been a holiday favorite in my kitchen for years. I first adapted the idea from a vintage cookie exchange recipe during a chilly December when I wanted something that combined rich cocoa flavor with a bright cherry pop. The first time I took them to a family gathering everyone asked for the recipe, and they became an instant request for birthdays and potluck dinners. The dough is tender and slightly chewy, while the cherry filling adds a burst of syrupy fruitiness. The glossy chocolate glaze ties everything together with an extra layer of chocolate that sets up with a gentle shine.
What I love most about these is how forgiving they are. The dough is simple—no chilling required—and the thumbprint technique is fast and approachable for novice bakers. The texture contrasts are a big part of the charm: a tender outer cookie, a slightly crisp edge where they meet the oven, and the jammy cherries in the center. I often make a double batch because friends and neighbors never leave empty-handed. If you enjoy classic thumbprint cookies but want something more chocolate-forward, this combination is one of my go-to comfort bakes.
Personally, this recipe became a household staple after I brought a tray to a neighborhood winter potluck. The jar of cherry pie filling is my little secret shortcut—there’s something nostalgic about the glossy cherries against rich cocoa dough. Over the years I’ve experimented with different chocolates and syrups in the glaze and landed on the balance below as my favorite: the glaze sets smooth and shiny but remains soft to bite into, and the cherries stay jammy without bleeding into the cookie.
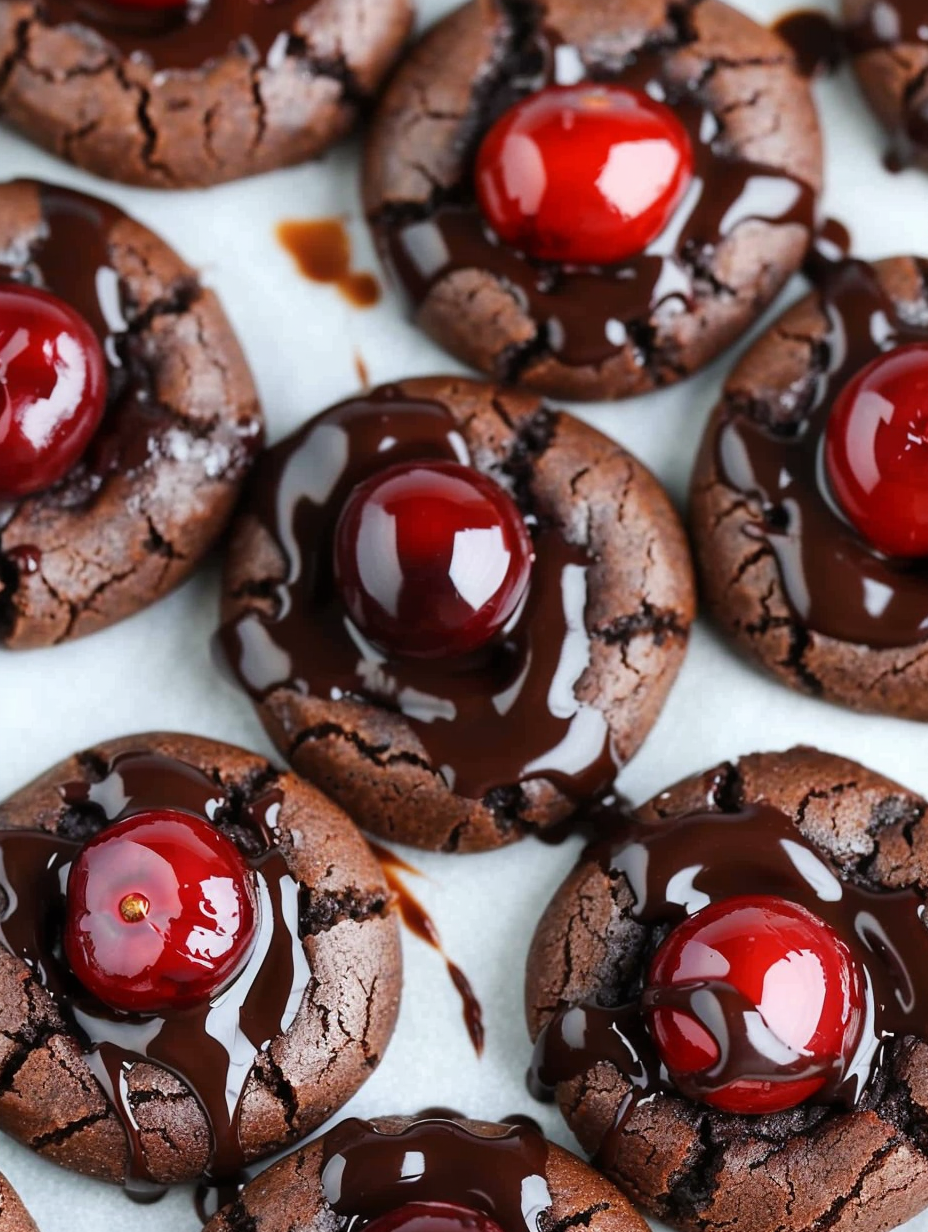
My favorite thing about this treat is the way the glossy glaze highlights the cherries—there’s something very celebratory about that pop of color on a dark cookie. Over many batches I’ve learned to reserve a little extra syrup from the cherry filling to spoon over any misshapen centers, keeping them looking polished and uniform for a cookie tray. Family members often comment that these look store-bought, which is always a nice compliment for such a simple method.

Store cooled cookies in a single layer or with parchment between layers in an airtight container at room temperature for up to three days. For longer storage, freeze baked cookies in a sealed container with parchment layers for up to three months. To reheat, let frozen cookies thaw on the counter for about 30 minutes, or warm briefly in a 300°F oven for 5 minutes to refresh the texture and soften the glaze. If you freeze unbaked dough balls, arrange them on a tray to freeze solid and then bag them; bake from frozen, adding 1–2 minutes to the bake time and watching for that soft center cue.
To make dairy-free swaps, replace butter with a 1:1 vegan baking stick and use a dairy-free chocolate for the glaze, and replace milk with a plant-based alternative like almond or oat milk. For an egg-free version, substitute one large egg with a flax egg (1 tablespoon ground flaxseed mixed with 3 tablespoons water, chilled) but expect slightly different texture—use a touch more moisture if the dough feels dry. Swap cherry pie filling with raspberry or apricot preserves for a different flavor profile; reduce syrup if using very loose preserves to avoid overspilling in the oven.
Serve these cookies on a holiday platter with powdered sugar-dusted shortbreads and a few nutty cookies for contrast. They pair wonderfully with a strong coffee or a slightly sweet dessert wine. Garnish with a light dusting of cocoa on the platter or a few whole maraschino cherries for color. These also travel well for cookie swaps—pack them in single layers with parchment to keep the glaze intact.
Thumbprint-style cookies have roots in European baking traditions where small jam-filled cookies were popular at gatherings and holidays. This chocolate-cherry variation blends that classic jam-filled treat with American chocolate baking—cherries are a frequent accompaniment to chocolate in classic U.S. desserts, influenced by both local fruit preservation and imported confectionery traditions. The modern shortcut of using canned pie filling keeps the essence of the original while streamlining the process for contemporary home bakers.
In winter, use cherry pie filling with extra spices like a pinch of cinnamon or orange zest mixed into the filling for festive warmth. In summer, consider fresh macerated cherries spooned into the centers after baking and a thinner ganache drizzle. For Valentine’s Day swap semi-sweet chocolate for dark chocolate and use heart-shaped cookie cutters for presentation tweaks. The dough is neutral enough to welcome seasonal extracts—try a teaspoon of almond extract with cherries for a classic pairing.
For batch prep, form all dough balls and freeze on trays; when frozen, transfer to resealable bags. On bake day, place dough balls on lined sheets and top with cherries directly from the can; the frozen dough will keep the filling from sinking too deep. Pack baked cookies in single layers for gifting or divide into small snack-sized portions in resealable containers for lunches. This recipe scales well—double or triple for cookie swaps and holiday trays, using additional baking sheets so you can rotate them through the oven efficiently.
Finally, these Chocolate Cherry Thumbprint Cookies are simple, adaptable, and always well-received—give them a try and make them your own with a swap or two. There’s joy in handing someone a warm cookie with a glossy cherry center; it never fails to bring a smile.
Measure flour by spooning it into the measuring cup and leveling with a knife to avoid dense cookies.
Use a small cookie scoop for uniform cookies so bake times stay consistent across the tray.
Let glaze cool slightly before spooning so it sets on the cherries and doesn’t run off the cookie edges.
Press the thumbprint twice in an X shape to create a shallow well that holds cherries and glaze without overflowing.
This nourishing chocolate cherry thumbprint cookies recipe is sure to be a staple in your kitchen. Enjoy every moist, high protein slice — it is perfect for breakfast or as a wholesome snack any time.
Yes. You can freeze unbaked dough balls on a tray and then store them in freezer bags for up to 3 months. Bake directly from frozen, adding 1–2 minutes to the bake time.
Store in an airtight container at room temperature for up to 3 days. Refrigerate up to 1 week, or freeze for up to 3 months.
This Chocolate Cherry Thumbprint Cookies recipe makes perfectly juicy, tender, and flavorful steak every time! Serve with potatoes and a side salad for an unforgettable dinner in under 30 minutes.
Preheat oven to 350°F. Whisk together flour, baking soda, baking powder, salt, and cocoa powder until fully combined and lump-free.
Cream butter with granulated and brown sugar until light and slightly fluffy. Beat in the egg and vanilla until smooth.
Slowly add the dry mixture to the wet ingredients and beat on low until just combined. Avoid overmixing to keep cookies tender.
Scoop rounded tablespoonfuls, roll into balls, place on parchment-lined sheet, and press a thumb into the center twice to create an X-shaped well.
Spoon about three cherries into each well and bake at 350°F for 9–10 minutes until edges are set and centers look slightly soft.
Melt chocolate chips with butter, corn syrup, and milk over low heat, stirring until smooth and glossy. Cool slightly to thicken.
Spoon or drizzle glaze over the cherries. Allow glaze to set at room temperature for 20–30 minutes before storing.
Last Step: Please leave a rating and comment letting us know how you liked this recipe! This helps our business to thrive and continue providing free, high-quality recipes for you.
Leave a comment & rating below or tag
@royalrecipe on social media!

Easy homemade thin-crust three-cheese spicy chicken and jalapeño pie — a flavor-packed pizza with a satisfying kick, perfect for pizza night or game day.

A bright, creamy BLT pasta salad tossed with basil pesto, fresh greens, cherry tomatoes, and crisp bacon—perfect for warm-weather gatherings and meal prep.

Tender sautéed shrimp tossed with spaghetti and a creamy sweet-spicy bang bang sauce—ready in under 30 minutes for a weeknight favorite.
Leave a comment & rating below or tag @royalrecipe on social media!
Enjoyed this recipe? Share it with friends and family, and don't forget to leave a review!
This recipe looks amazing! Can't wait to try it.
Comments are stored locally in your browser. Server comments are displayed alongside your local comments.
Join to receive our email series which contains a round-up of some of our quick and easy family favorite recipes.
