
Caramel Cheesecake Bites

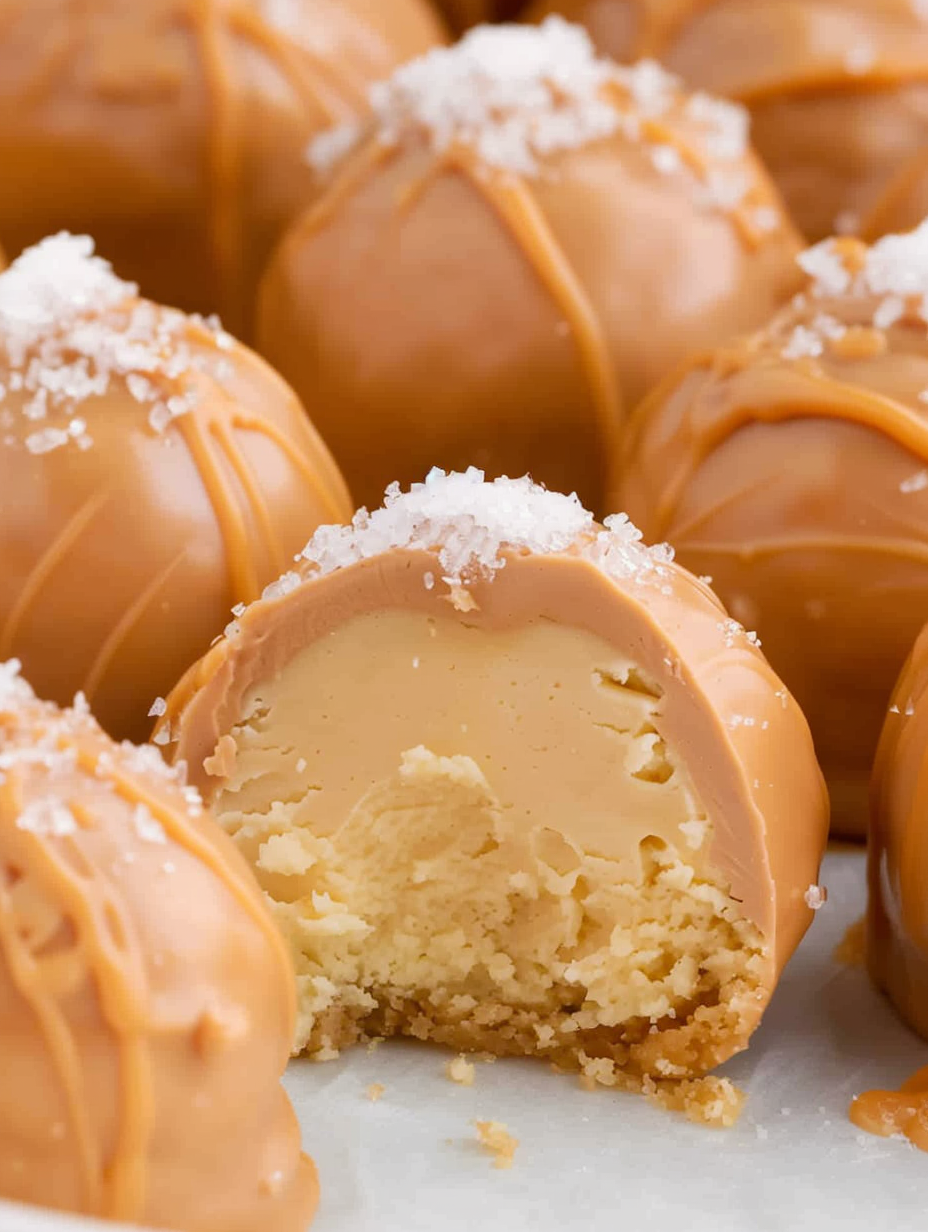
Mini caramel cheesecake bites: creamy cheesecake centers enrobed in a salted caramel shell—easy to make and perfect for parties or sweet cravings.
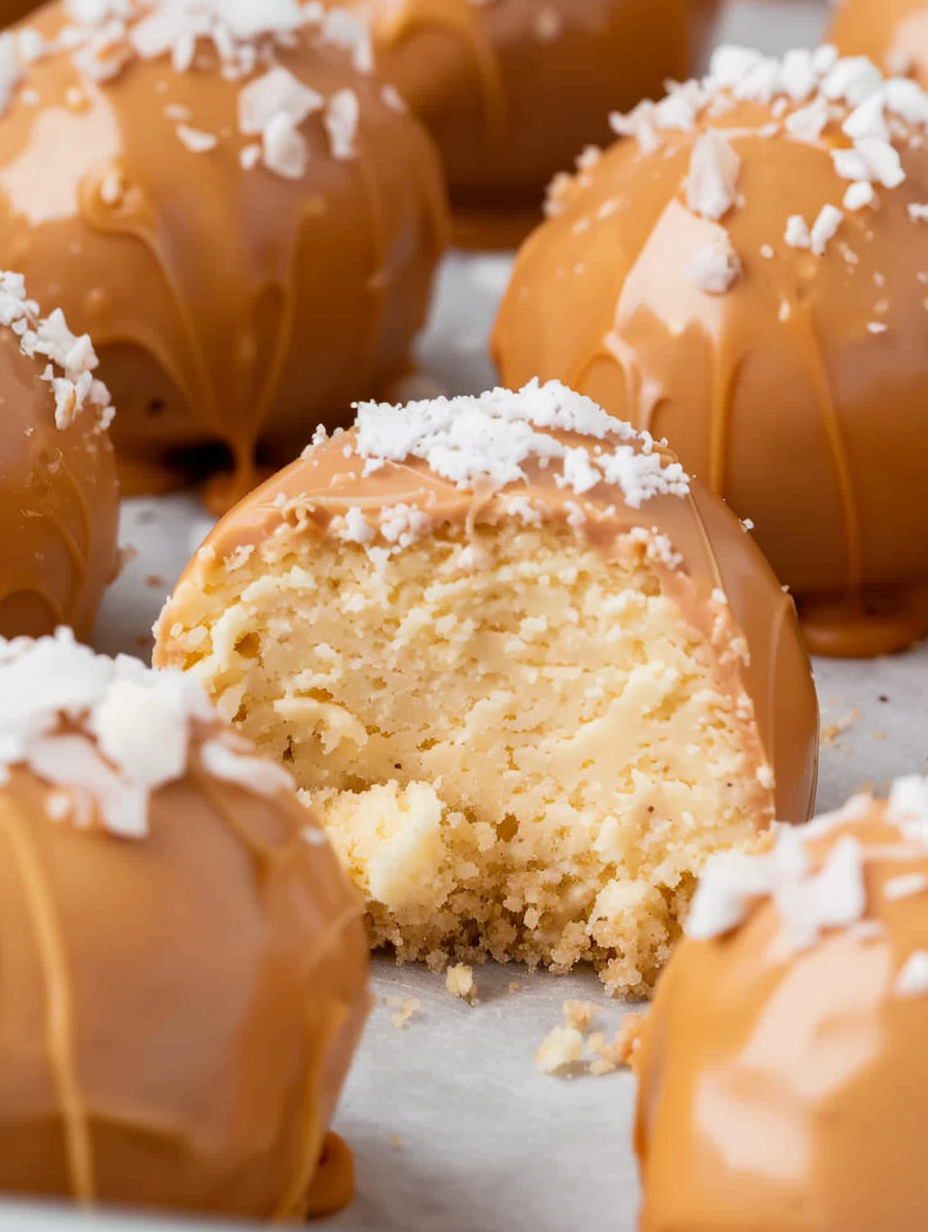
This recipe for mini caramel cheesecake bites began as a simple experiment for a holiday cookie swap and quickly became a signature treat I bring to every gathering. I first combined softened cream cheese with dry cake mix and a whisper of caramel flavor on a rainy afternoon when I wanted something sweet without turning on the oven. The first batch produced silky, creamy centers that contrasted beautifully with the buttery salt of the outer coating, and the bites disappeared within an hour. The texture—luxuriously smooth inside and crisp-snap outside—reminded me of boxed chocolates but infinitely easier to make.
I discovered the heat-treatment step for the dry cake mix after one early attempt produced a chalky mouthfeel. Microwaving the dry mix briefly and allowing it to cool removes any raw flour note and stabilizes the dough so the centers set properly. These little bites are forgiving, travel well, and are ideal for last-minute entertaining. They are small enough to serve as an after-dinner candy or plated on a dessert tray for a potluck. I love keeping a jar in the freezer for unexpected guests; a quick thaw makes them perfectly tender again.
Why You'll Love This Recipe
- Ready with only 10 minutes active prep and 2 hours of chilling, the bites are a low-effort way to serve an elegant dessert for a crowd.
- Uses pantry staples like a yellow cake mix and cream cheese plus salted caramel candy melts for a professional look with minimal technique.
- Heat-treating the dry mix improves safety and texture, so the centers remain creamy without any raw flour flavor.
- Make-ahead friendly: dough chills for easy scooping, and finished bites store well in the refrigerator or freezer for weeks.
- Crowd-pleasing balance of sweet and salty—ideal for parties, cookie swaps, or a simple indulgence after dinner.
- Adaptable for dietary needs with straightforward swap suggestions for dairy-free or gluten-free options.
When I brought these to my sister's birthday, her three young children proclaimed them the best candy ever, and their parents couldn’t stop asking for the recipe. Over time I refined the rolling and coating steps so each bite has a smooth, even shell and no drips, and I include those technique notes below so you get consistent results every time.
Ingredients
- Yellow cake mix (15.25 ounces): Use a standard boxed mix such as Betty Crocker or Pillsbury. The dry mix provides structure and sweetness; heat-treat briefly to remove any raw flour flavor before adding.
- Cream cheese (8 ounces), softened: Full-fat cream cheese like Philadelphia gives the creamiest texture. Remove from the fridge 30 minutes before starting so it whips smoothly with the mixer.
- Caramel flavoring (2 teaspoons): A concentrated caramel extract heightens the caramel profile without adding extra liquid. Brands like LorAnn or McCormick work well; use sparingly to avoid overpowering the cream cheese.
- Salted caramel candy melts (12 ounces): Look for Wilton Candy Melts in salted caramel or Ghirardelli caramel coating wafers. These melt smoothly and set with a glossy, snap-like finish. If you prefer, use milk chocolate mixed with a tablespoon of caramel sauce plus a pinch of flaky sea salt for coating.
- Optional finishing salt: A light dusting of flaky sea salt enhances the sweet and salty contrast—use sparingly for balance.
Instructions
Heat-treat the dry mix: Place the entire 15.25-ounce dry yellow cake mix in a microwave-safe bowl. Microwave in two 30-second bursts, stirring between each interval to distribute heat evenly. Allow the mix to cool completely to room temperature; this step removes any raw flour flavor and prevents graininess in the final dough. Beat the cream cheese: In a medium bowl, use a handheld electric mixer on medium-high to beat 8 ounces of softened cream cheese and 2 teaspoons of caramel flavoring for 1 1/2 to 2 minutes until completely smooth and lump-free. Scrape the bowl periodically to ensure even mixing. Fold in the cooled cake mix: Sprinkle the cooled, heat-treated cake mix over the whipped cream cheese a little at a time. Fold gently with a spatula until just incorporated; avoid overworking to maintain a tender, mousse-like center. The dough should hold together without being sticky. Chill to firm up: Tightly wrap the bowl with plastic wrap or cover with a lid and refrigerate for 2 hours. Chilling firms the dough so it is easy to scoop and roll into neat balls. Scoop and shape: Line a baking sheet with parchment paper. Use a 1-tablespoon cookie scoop to portion the dough—this yields roughly 28 bites. Roll each portion between your palms to create smooth spheres and place them on the prepared sheet. Keep the scooped bites chilled while you prepare the coating. Melt the coating: Use a microwave-safe bowl to melt 12 ounces of salted caramel candy melts in 30-second intervals, stirring thoroughly after each burst until glossy and smooth. Avoid overheating; stop when most pieces are melted and stir until residual heat finishes the melt. Coat each bite: Using a fork or dipping tool, lower a chilled cheesecake ball into the melted coating, ensuring full coverage. Lift it out and tap the fork gently to remove excess coating. If bare spots appear, spoon additional coating over them. Transfer each coated bite back to the parchment with a toothpick or fork, then remove the utensil carefully so the bite sits neatly on the sheet. Set and finish: Let the coated bites harden at room temperature until set, about 20 to 30 minutes, or accelerate setting by placing the tray in the refrigerator for 10 to 15 minutes. If desired, finish with a light sprinkle of flaky sea salt before the coating is fully set.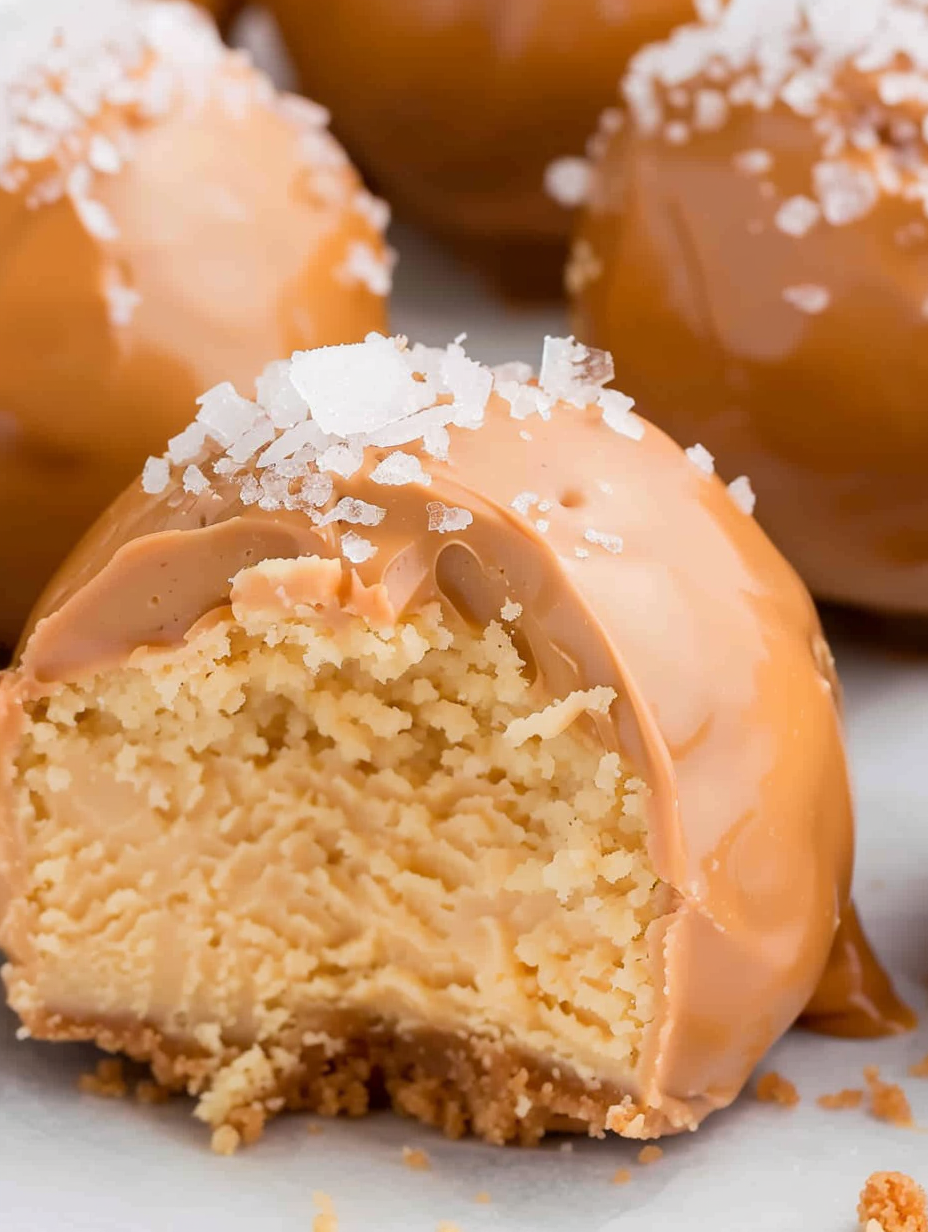
You Must Know
- These bites are best stored refrigerated in an airtight container for up to 7 days and freeze well for up to 3 months if placed in a single layer then transferred to a sealed container.
- Heat-treating the dry cake mix eliminates the raw flour flavor and improves food safety; do not skip this step.
- Allow the coating to cool slightly before dipping to avoid melting the centers; aim for a coating temperature around warm but not hot.
- Nutrition per bite: approximately 132 calories, 23 g carbohydrates, 4 g fat, and 2 g protein. They are small treats rather than a substantial snack.
My favorite thing about these bites is how reliably they impress with minimal fuss. I once made 200 for a charity bake sale, packing them in muffin tins for stability during transport; every tin sold out. The simple flavor profile—cream cheese, yellow cake, and caramel—feels nostalgic yet refined when finished with a pinch of sea salt.
Storage Tips
Store finished bites in a single layer or separated by parchment in an airtight container. Refrigerate for up to 7 days; for longer storage, freeze on a baking sheet until solid, then transfer to a freezer-safe container for up to 3 months. Thaw in the refrigerator overnight or at room temperature for 30 minutes before serving. Avoid stacking warm bites, as condensation can soften the coating—always allow bites to fully set before covering.
Ingredient Substitutions
For a gluten-free version, use a certified gluten-free yellow cake mix and confirm the candy melts are gluten-free. To make dairy-free bites, substitute cream cheese with a full-fat vegan cream cheese alternative and use dairy-free caramel candy melts; texture will be slightly different but still delicious. If you lack caramel flavoring, replace the 2 teaspoons with 1 tablespoon of caramel sauce, but reduce any added liquid elsewhere to keep the dough firm.
Serving Suggestions
Serve these on a decorative platter with small dessert forks or toothpicks for easy picking. Pair with strong coffee or a dessert wine such as a late-harvest Riesling. For a festive touch, garnish with a tiny sprinkle of toasted pecans or a drizzle of dark chocolate. They also work well packed in small boxes or cello bags as homemade gifts.
Cultural Background
The concept of a creamy center coated in chocolate or candy is a classic confection approach seen in many traditions—think truffles or petit fours. These bites are a playful American adaptation that combines boxed cake mix convenience with classic cream cheese filling and the modern popularity of candy melts. They reflect the practical, inventive spirit of home bakers who create special treats with accessible ingredients.
Seasonal Adaptations
For winter holidays, add 1/2 teaspoon cinnamon and a pinch of nutmeg to the dough and use gold or red sprinkles on top. In summer, swap salted caramel melts for white chocolate and fold in 1 teaspoon lemon zest for a bright contrast. For autumn, mix in 2 tablespoons pureed pumpkin and 1/4 teaspoon pumpkin spice, then use milk chocolate coating for a cozy finish.
Meal Prep Tips
Make the dough up to 48 hours ahead; keep it refrigerated and portion with the scoop when ready to coat. If prepping for an event, fully coat half the batch on day one and freeze; finish coating the remainder on the day of the event for the freshest presentation. Use muffin tins to stabilize bites while setting if you need to move them during transport.
These little bites bring together ease and indulgence, making them a reliable choice for gifting, parties, or a small, satisfying dessert at home. Try one warm from the fridge and notice the perfect contrast between the creamy interior and the crisp caramel shell—then make a double batch so you have extras for later.
Pro Tips
Heat-treat the dry cake mix in the microwave to remove raw flour flavor before combining with cream cheese.
Use a 1-tablespoon cookie scoop for uniform bite size and consistent setting times.
Let the candy melts cool slightly after melting before dipping so the centers do not soften.
Chill the dough for the full 2 hours to make rolling and coating much easier.
If coating looks dull or grainy, it was likely overheated; reheat gently in 10-second bursts and stir until smooth.
This nourishing caramel cheesecake bites recipe is sure to be a staple in your kitchen. Enjoy every moist, high protein slice — it is perfect for breakfast or as a wholesome snack any time.
Tags
Caramel Cheesecake Bites
This Caramel Cheesecake Bites recipe makes perfectly juicy, tender, and flavorful steak every time! Serve with potatoes and a side salad for an unforgettable dinner in under 30 minutes.
Instructions
Heat-treat the dry cake mix
Place the 15.25-ounce yellow cake mix in a microwave-safe bowl and microwave in two 30-second intervals, stirring between each. Allow to cool completely to room temperature before combining with cream cheese to avoid a raw flour flavor.
Whip the cream cheese
Beat 8 ounces of softened cream cheese with 2 teaspoons of caramel flavoring using a handheld electric mixer on medium-high for 1 1/2 to 2 minutes until smooth and free of lumps.
Incorporate the dry mix
Sprinkle the cooled cake mix over the whipped cream cheese and fold gently until just combined. The dough should form a cohesive, slightly firm mixture suitable for scooping.
Chill the dough
Cover the bowl tightly and refrigerate for 2 hours to firm up the dough and make it easy to scoop and shape.
Scoop and shape into balls
Line a baking sheet with parchment. Use a 1-tablespoon cookie scoop to portion dough, roll each portion into a smooth ball, and place on the prepared sheet. Keep chilled while preparing the coating.
Melt the candy coating
Melt 12 ounces of salted caramel candy melts in a microwave-safe bowl in 30-second intervals, stirring after each, until smooth and glossy. Avoid overheating to prevent graininess.
Dip and coat each bite
Dip each chilled ball into the melted coating with a fork, tap off excess, and place back on the parchment. Use a spoon to cover any bare spots. Add a light sprinkle of flaky sea salt if desired.
Set the coating
Allow the coated bites to set at room temperature for 20-30 minutes or refrigerate for 10-15 minutes until fully hardened before storing or serving.
Last Step: Please leave a rating and comment letting us know how you liked this recipe! This helps our business to thrive and continue providing free, high-quality recipes for you.
Nutrition
Did You Make This?
Leave a comment & rating below or tag
@royalrecipe on social media!
Categories:
You might also like...

Spicy Chicken and Jalapeño Thin Crust Pizza
Easy homemade thin-crust three-cheese spicy chicken and jalapeño pie — a flavor-packed pizza with a satisfying kick, perfect for pizza night or game day.

Creamy Pesto BLT Pasta Salad
A bright, creamy BLT pasta salad tossed with basil pesto, fresh greens, cherry tomatoes, and crisp bacon—perfect for warm-weather gatherings and meal prep.

Bang Bang Shrimp Pasta
Tender sautéed shrimp tossed with spaghetti and a creamy sweet-spicy bang bang sauce—ready in under 30 minutes for a weeknight favorite.
Did You Make This?
Leave a comment & rating below or tag @royalrecipe on social media!
Rate This Recipe
Share This Recipe
Enjoyed this recipe? Share it with friends and family, and don't forget to leave a review!
Comments (1)
This recipe looks amazing! Can't wait to try it.
Comments are stored locally in your browser. Server comments are displayed alongside your local comments.
Hi, I'm Amara!
What's Popular

30-Minute Meals!
Join to receive our email series which contains a round-up of some of our quick and easy family favorite recipes.